-
Batik: A Taste of Traditions
First and foremost, I’d like to apologize for disappearing for a long period of time. Though my updates were coming from Instagram, I personally feel terrible that I had not been able to keep to my goal of maintaining updates here.
Anyways, with regards to my Post title. I am very proud to share the opportunity to run a workshop at the Yayasan Sime Darby Art and Music Festival 2018 (YSDAF2018). It was an honour to be able to run a batik workshop with people outside of my workspace. Though it was a short it was a truly memorable and encouraging experience.
Batik is truly a traditional art that is recognised an icon of Malaysia. This is one of the many others that have now become the favourite of the Western world. However, contrary to what many say and believe, it is an art that carries very few practitioners. As for me it was for pure love and passion for creating a masterpiece through one of the many forms of fabric painting!
Perhaps in another post I shall share a simple step for you to create your own Batik piece.
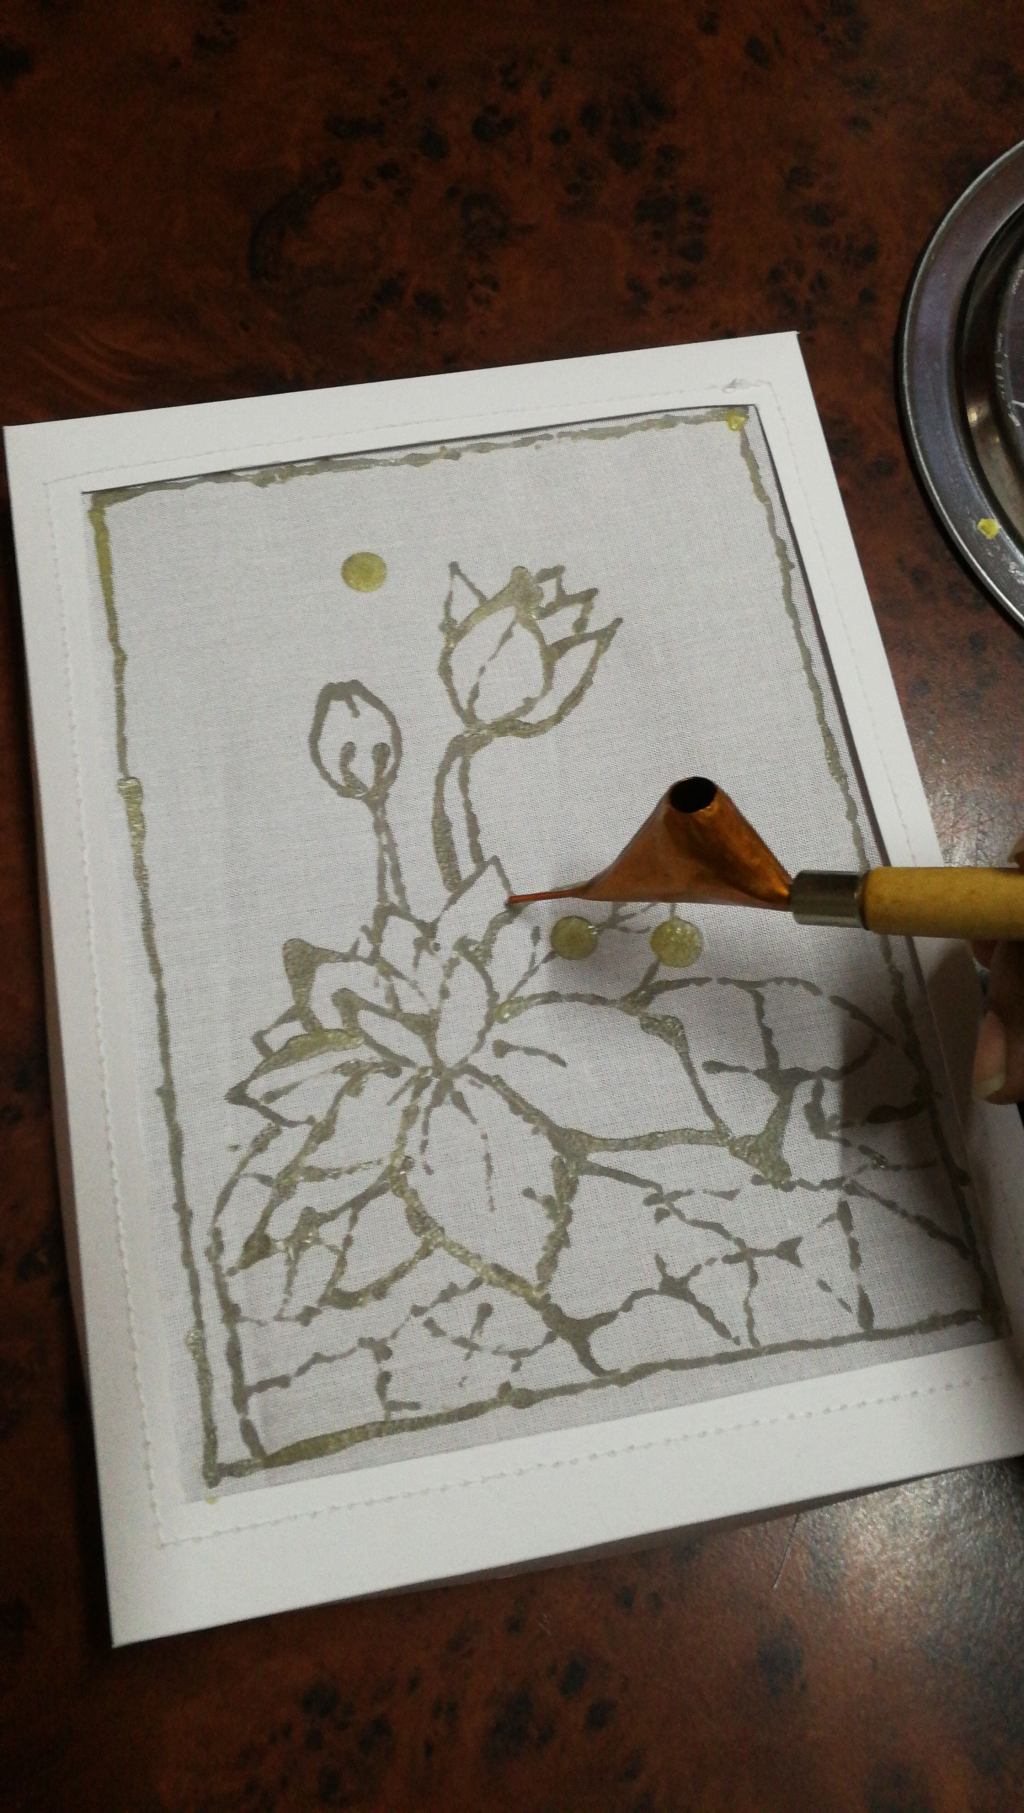
 (Above)Kick-starting with blocking out the design using wax and Tjanting.
#batik #batikarts #batikworkshop #ysdaf #ysdaf18 #ysdaf2018
-
M-I-A status

 HEY ALL! I am not dead yet!
I have been super busy of late!
I have some exciting news to share and I truly hope it is not too late!!!
See you soon!
-XOXO-
-
Silkscreen with me
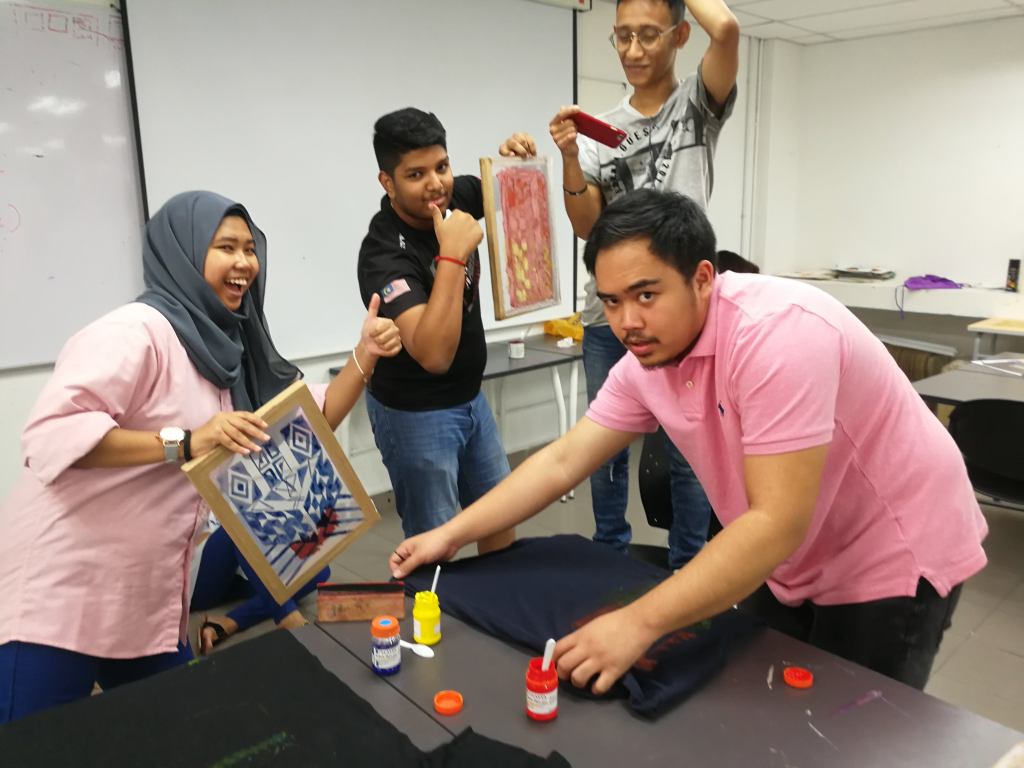
Working with students can all terrifying, exhilarating and most importantly, full of laughter.
 A couple of weeks ago, I decided to explore an alternative method for Silkscreen Printing. Here is a little introduction to What is SilkScreen Printing? This is a technique also known as Screen Printing that was made popular in the late 18th century. History has it that this technique first appeared in Asia in the 900s. It is a hand-printing technique that as the name suggests uses a screen made of mesh that has been stretched over a frame and upon which a design would be placed for printing with various colours.
  Traditionally, you would expose the screen with UV lighting to create a positive-negative effect. The negative area is where the the ink will fall through. The actual process can take up a day at least with the use of various chemicals and steps.
  That being said, the alternative method uses a gel-like substance that is directly drawn onto the screen. I used products from Daler Rowney (to be honest, there are a lot of other options – for instance, Speedball but in most of my works, I tend to be swayed to using Daler Rowney). As I was saying, the gel-like substance is called Screen Drawing Fluid from the System3 Series and this is coupled with the Removable Screen Block. Both of these are the essentials to creating a good alternative to silkscreen. Added to it is sheer patience as you may very well not achieve it in your first few tries.
Therefore, enjoy the video above and do share if you are ever going to try this technique!
#silkscreen #alternativesilkscreen #dalerrowney #screenprinting #andywarhol
-
Illumination
Illuminated manuscript. One of the oldest and iconic styles of art history dating from the 16th century of the Middle Ages. Almost every continent has contributed in some away or another this part of history.
 Among some of the famous manuscripts – The Lindisfarne Gospels, The Book of Kells, and many more across Eastern Europe from the Byzantium period.
 As such I decided to explore and as part of one of my History of Art lesson, provide my students with a small demonstration on one of the techniques used during that period of time. This technique is called gilding – a technique that requires the use of gold foil or leaf. In ancient times, it was a technique only mastered by very few due to the tedious and intricate designs. The gold leaf used are actual 24k gold that is hammered into extremely thin pieces and later applied as filler to alphabet or border outlines, or used as background.
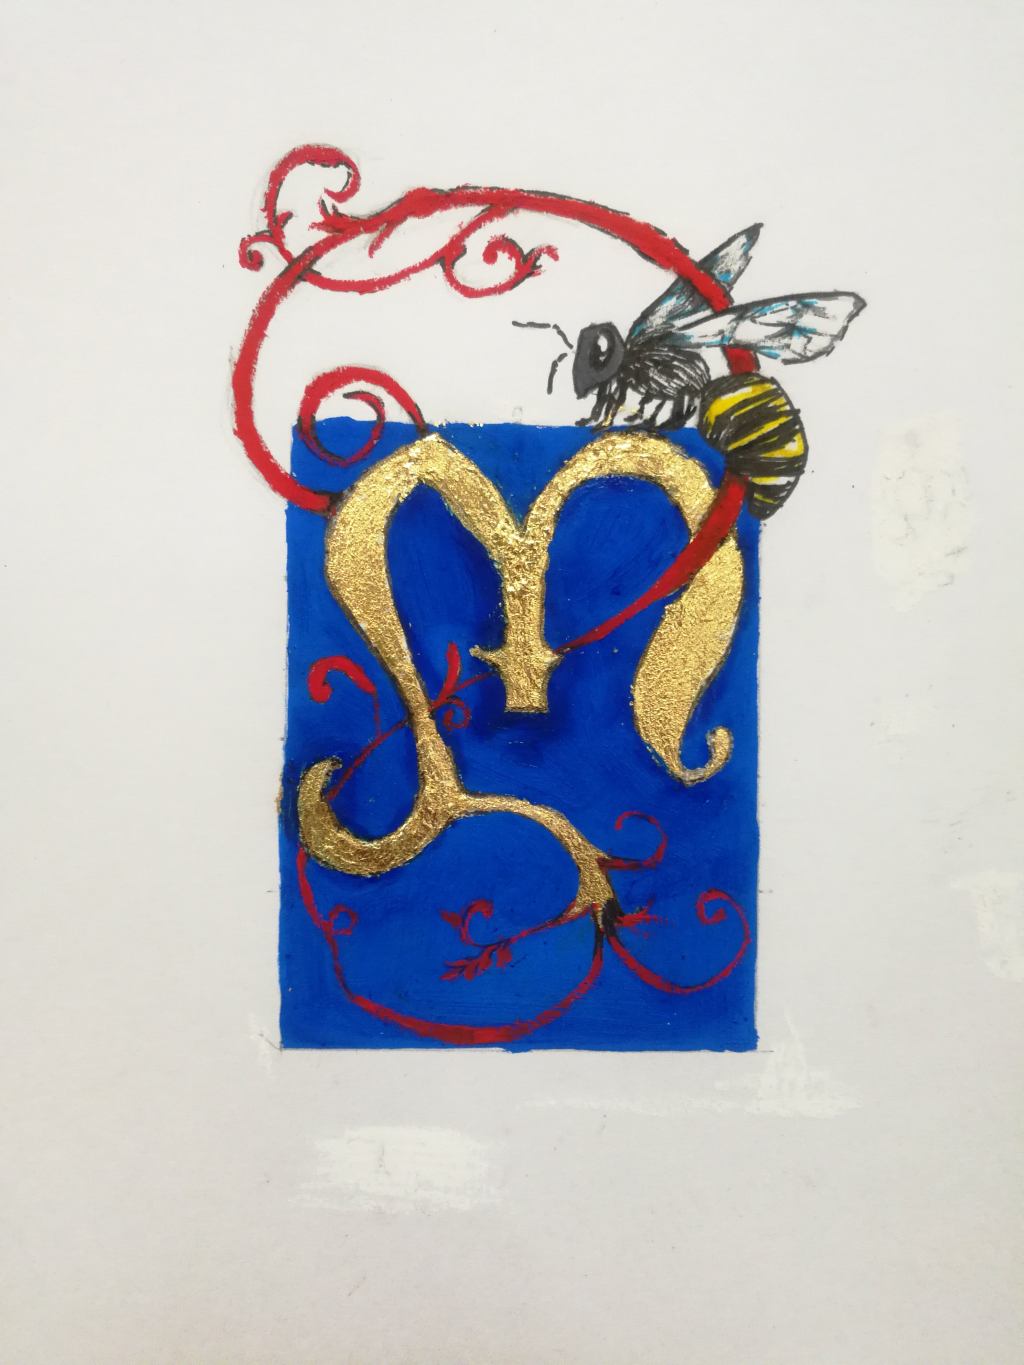
Similarly, I used the gilding technique. So to start of, I made some simple sketches and from there started to make a simple grid to draw my letter. Once I was happy with the vines and the little bee which is the Greek representation of my name, I mixed a little gesso with water and painted over the alphabet. This was to create a little emboss effect. Once that was dried, I took it over to my History of Art class and provided them with the gilding demo. This was accomplished by brushing a light layer of adhesive and slowly laying a sheet of gold leaf. Gently tap the leaf down so it may stick to the adhesive and later I used a brush to remove the excessive leaf to reveal an illuminated alphabet.
However, there was one minor issue – instead of using a sponge brush to apply the adhesive, I had used a paint brush. The disadvantage of this was there was an excess of adhesive left over the letter that somewhat had smudged around my intended area. The results… MESSY! Anyway here are some shots my attempt:
So let me know what are your thoughts on this attempt or share a picture if you plan to attempt your very own illuminated alphabet!
#artsyworkshop #gilding #arthistory #illuminatedalphabet #illuminatedmanuscript
-
Meet the Ong family
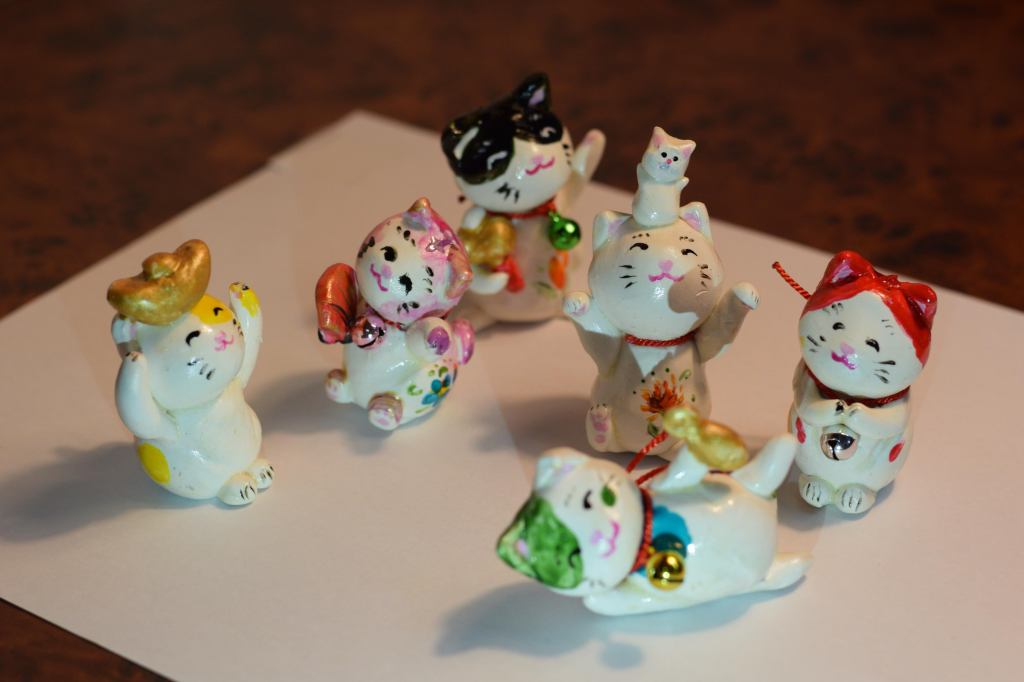
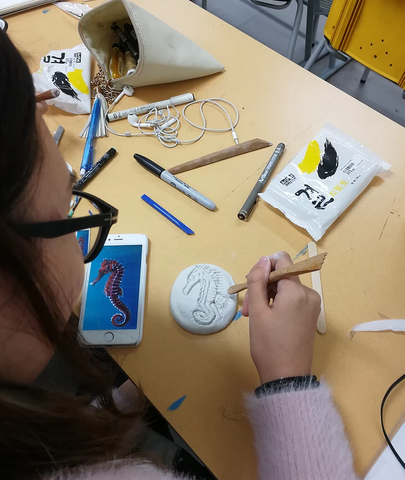
 Of late, I had been keeping myself busy with some sketches to a request of a very special friend and mentor. She had personally requested for a set of Maneki-Nekos or otherwise, popularly known as Lucky Cats!
Generally, Asian people would have one or two in their stores or home to boost their businesses or for protection purposes and there are those who just find these cats alarmingly cute. Having noted that and also my personal interest in these cats, I decided to explore in it and that resulted in the Ong Cat family!
Like most projects that I embark on there are the numerous sketches and this case, I had added into each of them a little spark of personality based on their Lucky Charms. Additionally, to make it more personalized, and for the love of Care Bears and My Little Ponies, each of my cats carried a special flower – ranging from tulips to lavender pulps.
 The process was very simple, as my aim was to stay as close as possible to how the original Maneki Neko is model wherein the details are hand-painted onto each model. So, each and every model was weighed (I had no digital scale and so this was a rather tedious task to ensure the spread was equal) and then model as per sketches done earlier. Next, I set it to bake and left it to stand overnight to not only allow the clay to cool-down but also to let it harden. Some of the models did require some sand papering to smoothen out and I had to be thoroughly careful as to not accidentally break a part or completely destroy it.
 Nevertheless it was in fact, a good learning curve as a couple of things that i learnt from this experience was how being an oven-baked clay type material, I took a huge risk in baking it multiple times. Additionally, there was one problem I faced. The characters that I had designed can never be reproduced and it was a one-of-a-kind (OOAK) design now! As proud as I was initially, it was a bit saddening to know that these little guys can’t really be shared with others. That however, gives me the inspiration to look for alternative methods to reproducing these types of materials in the near future.
Anyway, that’s all for sharing in this post and till next time!
#designdotmuses #claystories #polymerclay #sculpey3
-
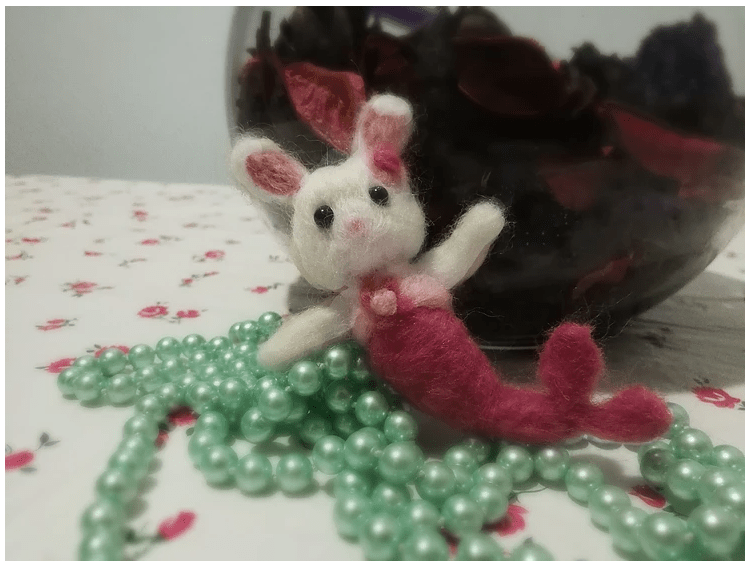
Sea Princess
I have a major issue – an obsession with rabbits, and that’s how I ended up making a needle felted doll. It all started with my usual and occasional visit to the Daiso outlet located not too far off from my housing area. I do make it a point to visit any of the Daiso outlets whenever I visit any of the malls within the Klang Valley and trust me, I always walk out of there with something or two. This time it was the needle felting kit.
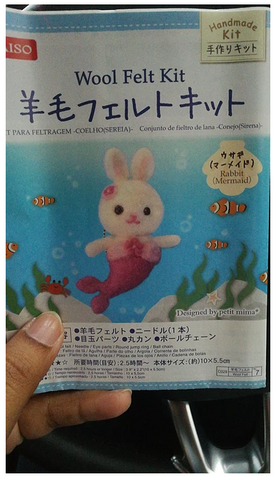
Priced at RM 5.60, it comes with three different colored wool fibers, a felting needle, some plastic push buttons (to act as the eyes) and some extra accessories to turn your final piece into a key-chain item. Additionally, it comes with a full spread with step-by-steps for enthusiasts to follow pretty easily. Quite honestly, the steps are very straightforward and easy to understand and follow especially if you are a beginner at needle-felting. A word of advice, do not feel disheartened if your final design does not look anything like what is on the cover. It is a learning process.Coming back to Mer-bunny Kit, instead of plunging myself into eternal damnation of stabbings, I decided to look up YouTube to see if there have been others who have attempted this kit. Lo and behold! There were many others which included one by Daiso too! I ran the video a couple of times just to digest how needle-felting works and it was precisely then did I realize that I lacked one more item! A foam mat to work as the stabbing work-space. So looking around my house, I substituted it with a dishwasher’s sponge and it worked perfectly well!
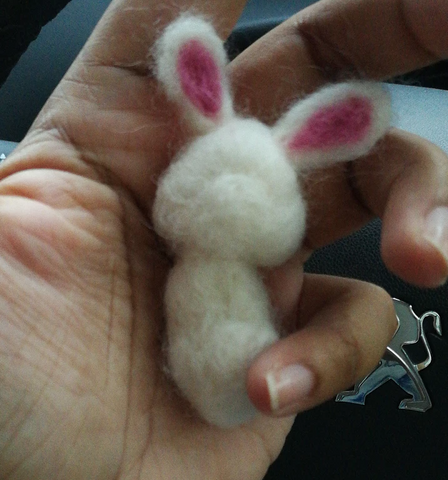
The instructions estimated about 1 to 1.5 hours to complete the entire piece, however, for a first-timer, it took me approximately 1 hour just to get the head, ears and body into formation. Nevertheless, patience is indeed a virtue and the perseverance led to the eventuality of completing a rabbit mermaid named Larelle (yes, please bear with me as I am in the habit of naming my creations!)By now I have already mastered the stabbing technique and have managed to refine the straying fibers into something that seems similar to the cover (2nd picture from the top down)

Overall, it takes approximately, 4 hours to completely master it but it is definitely a good try for those looking for something new to learn and distract themselves from the work-stress. Yup, it can be pretty therapeutic just stabbing some fibers into a special creation.Till my next muse~
#needlefelting #daiso #mermaidbunny #mermaidrabbit #2d3dadventures
-
The Accidental Mini-Me
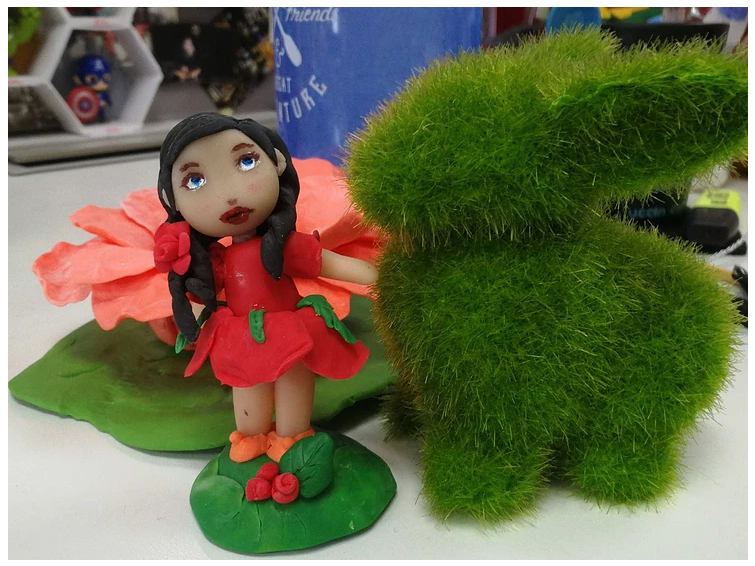
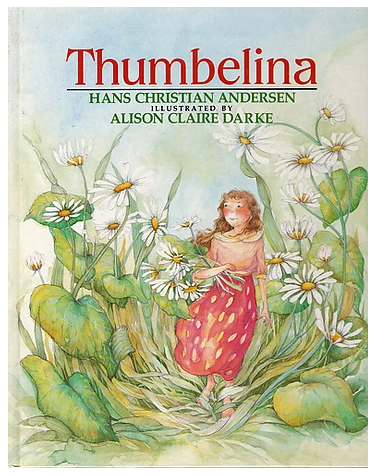
In my last post, I shared about my experimentals with various types of clay and in this I will share on my final finished little doll named Lil’ Rosa. What truly inspired me to do this was the famous fairytale entitled Thumbelina.

Now as the story tales,Thumbelina is a tiny girl who is born of a flower and has many exciting adventures which includes meeting toads who wanted nothing more than her hand in marriage – quite a funny tale that subtly reflects how some men can be (haha!). Anyway this little girl eventually meets her true love, the Fairy-Flower Prince and has her happily-ever-after marriage.
So just as the tale recounts, I decided to make my own Thumbelina and took the inspiration of a red rose. Hence a little girl in a rose petal dress, with orange boots came into process.
To kickstart it all, I started with modelling her face and for this and her arms and legs, I used my own concoction – cold porcelain. Now this substance is a homemade clay, made only of things you can find around your kitchen and can also be made in two ways – cooked or non-cooked. I decided to explore the non-cooking method as one of my major problems is patience. So one fine night, in the quiet of the night, I mixed the very last ounce of corn flour from my mother’s pantry, the very little balance of modge podge, some plain flour, a touch of white vinegar and a dash of olive oil. Using my bare hands, I rubbed on some oil to my hands and dug into the substance to mix it all. Once it was kneaded into a pretty soft dough, I tucked it into some cling-wrap and air-locked it into a ziplock, ready to be used by morning.

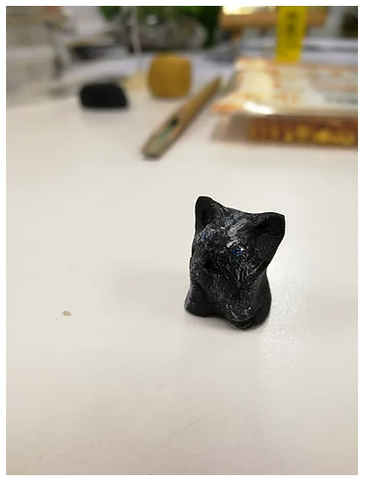
One of my earlier test models was this little black terrier. For this model, I got my hands dirtied with black acrylic in the attempts of kneading it into the clay to give it that pure look. This model stands at the height of 2.5cm, so I can assure that I pretty much surprised myself in making such fine details to such a miniature figurine. One thing about this clay is the time it took to harden – close to 24 hours for it to harden but once left for a week more, its rock solid! The finalising details were hand-painted with acrylic paint.
Next I attempted to model the face, arms and legs for Rosa. This time instead of mixing my clay with acrylic paint, I added a little bit of orange clay from Yenji’s Air-dry Clay. This was a bit of a risk as it was a combination of two different substances – a word of advice: do not try it! The clay became softer, more oily and extremely hard to model so I had to let it semi harden overnight before adding on the details.
So once it had harden did I add on the details. I chose to complete the rest of the model with Yenji’s clay as I wanted that someone rubber-look. Also I have to be a little bias, my cold porcelain mixed with some of the air-dry clay did give off a little roughed texture that was much better suited for the face and body parts.
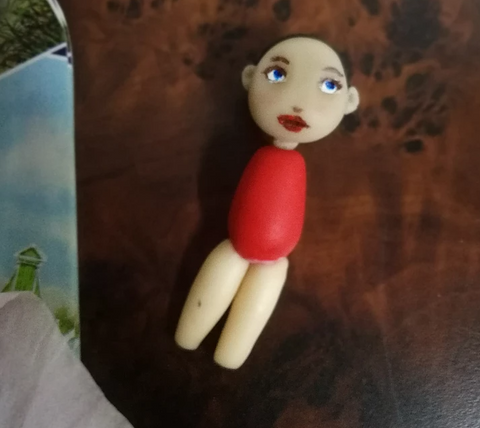
The downside of mixing materials and using air-dry type clays is the drying time and that is why it took me so long to complete it as I was always procrastinating the completion. Anyway, over the weekend I finally took some time to complete the hair and all the finer details and VOILA!

My very own Thumbelina named Lil’ Rosa.
#claystories #yenjiclaycraft #thumbelina #artsandcrafts #airdryclay #coldporcelain #homemadecoldporcelain
-
A Dive into Paper Clay
So once again, I gave my students a little challenge – learn to sculpt using paper clay. The aim of this exercise was firstly to practice patience as one of the main issues we encounter everyday is the endurance of maintaining our patience with the people around us. Sculpting clay is not just a mere skill but once mastered it can be a pretty zen thing for art and craft lovers.
Among the other things they had to observe was control of water as if they used too much, the clay will become too smudgy and soft, making it harder to sculpt and there is a high chance that the clay may fall apart once it had hardened.
Additionally, some took on the challenge of making their own sculpting tools with skewer sticks and popsicle sticks. Over all they were challenged to create a medium relief sculpture. However, some aimed slightly higher and decided to take on an attempt in making a high-relief sculpture.
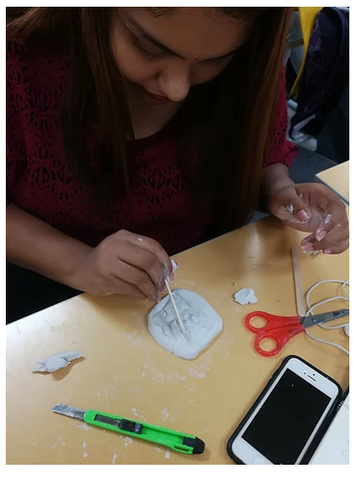
Over the period of frustration and laughters, the class eventually managed to attempt something that was eventually take home to be dried and painted for presentation.
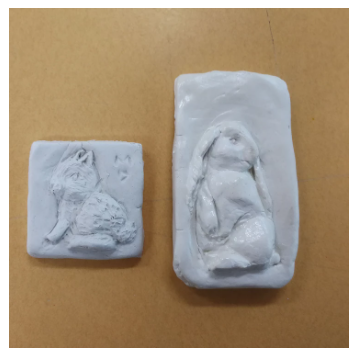
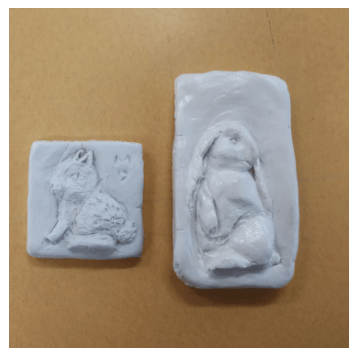
Here is the demo presentation that was presented to them in the class. The glazed piece (right) was the one I had prepared prior to the class as I was trying to determine how long it would take before the clay hardens; and the second one (left) was one I sculpted for the students’ in-class demonstration.
Till next time folks!
#claystories #artworkshop #paperclay
-
Hello Owell!

Recently, I have been experimenting on several types of clay – air-dry clay types and oven-bake types. Truthfully, it has been not only fun but exhilarating as the processes are really different and the outcomes as well.

For the earlier part of my experimentations, I decided to try out cold porcelain. As the name suggests, the cold porcelain is also known as a homemade clay – consisting of corn floor, white glue, vinegar or lemon and some oil. However, instead of using ordinary PVA white glue, I substituted it with Modge Podge Glue. This little Terrier was one of the few successes I had as the homemade substance can not only be really soft, its also very sticky to manage and mold into a free shapes. The good thing about this is its extremely hard once it hardens. Perhaps the best method of using this type of clay would be using a mould. But then again, this is only my opinion based on my experience.
However, I did have a little success when I used the similar batch to mold a mini doll. The cold porcelain was used to craft the arms and legs for my Lil’Rosa. I decided to let it semi harden before adding them to the body (which is off a different material).
I will continue more on Lil’ Rosa once I have completed here.
Finally, after a long contemplation, I decided to take a risk and try out the oven-bake polymer – Sculpey III. Now, this was really fun to work with as unlike using the homemade cold polymer, air-dry paper clay and the Yenji-air-dry polymer clay, I truly didn’t have to worry about it drying out and hardening. Additionally, this clay was really manageable to mold as compared to Sculpey Accent which took me close to 30 minutes to soften with some rolling and kneading.

Back to Sculpey III, I pulled out my little notebook which I keep for sketching down any ideas that come to mind. Now in my head, I made up mind into wanting to make a little Owl as a guidance animal totem for my pet-brother. As I told him, “I will make you a your very own Hedwig (Harry Potter’s owl)”. This truly excited him and that really brought some warmth to my heart.
Additionally, as I did my sketches, I decided to attempt making a Faux Blue China Porcelain. So with the little inspiration from my last travels to the Royal Delft Factory in Netherlands, I started my little adventure.
The first bake was really solid! It turned out exactly how I imagined it to look and here in the image above, is the glazing process – I used Sculpey Glossy Glaze and set it to dry before baking it again.
Once that was done, I paint it with Pebeo Porcelain 150 blue-color. Set it aside to settle and moved on to finally baking it.
Voila! Say hello to Little Owell!
#claystories #polymerclay #sculpey3 #sculpeyIII #littlebird #fauxporcelain #bluechinainpiration #experiment
-
Stamp it here!
Printmaking Patterns (Part 2)
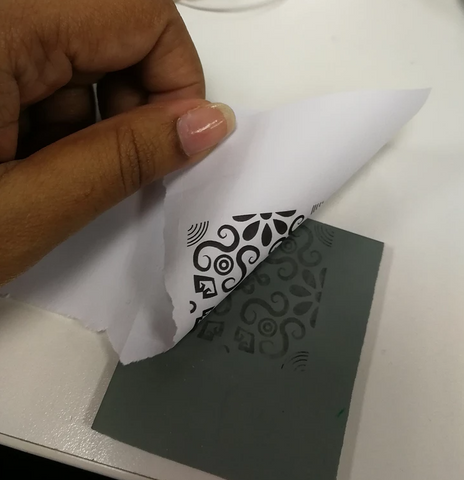
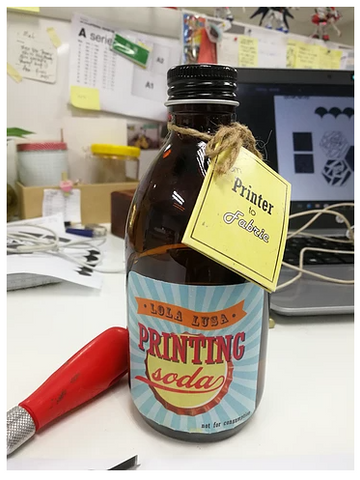
So here we go from drawing to printing… but WAIT! You need to carve out your stamp. Traditionally, you can trace your designs onto the linoleum but what I had done was transfer digital/printed image with a little concoction packaged by Lola Lusa. Her Printing Soda (below) contains acetone (y’know that chemical to remove nail polish) therefore, it is advisable to put on some gloves before making any attempts.
So as in the previous post, I noted that your design can be illustrated using AI to have a better finish. I had used regular printing for this project. (Below) The results was just as how I had wanted! A clear impression to work as a guide to carve out my block.

As my design was fairly intricate, there are some parts that I do admit were too small to carve through without damaging the other lines. So as I carved, I had to improvise my design and once, I was satisfied with my block (below), I started to prep for my printing. BUT WAIT!!! I nearly forgot my stencil design.
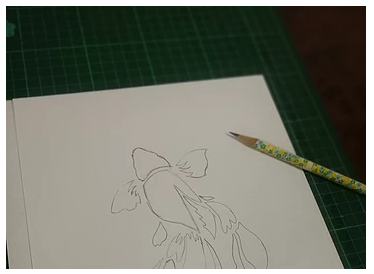
So for my stencil design, I designed to explore with the shape of a gold fish. So after sketching my design out, I began to slice out the inner areas as that was the area in which, I intended to have my pattern visibly seen. Personally, my only worry was if the design would be captured in the smaller corners near the fin and the fish tail…. (you’d see later that my worry did come into effect)
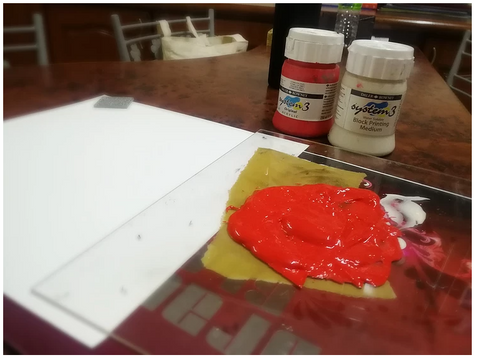
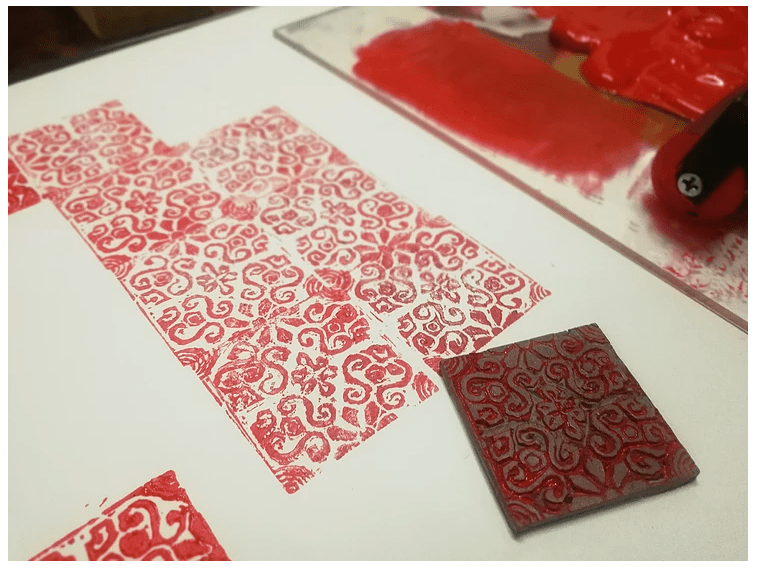
Now that I am done, its time to prep my ink for printing. For most of my linocut printing, I love using Daler Rowney’s System3 products (above) – here I am using the acrylic and Block Printing Medium (Water Soluble). My reason for loving this line is simply due to the fact that it is really easy to clean-up, however, you will need lots of practice before you can get the correct mixture. As for me, I go by an equal measure of a single teaspoon pour of acrylic and the medium. The tedious part comes when rolling the ink.

Test printing your block is always the best way to determine if it needs more carving or your ink needs more rolling. So be patient and keep trying till you get a very smooth and thin layer. That’s when you know that you ARE ready to print!
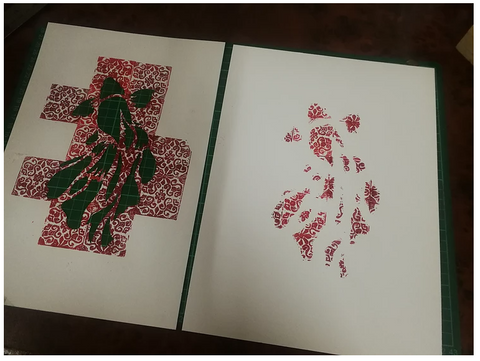
Here I have aligned the stencil above my drawing block and secured it to my cutting mat just so to avoid it from shifting as I tile-print my design. Since I do not own a printing press (nor have I taken the time to DIY one), I am going to stick to just using my strength to try as hard as possible to make sure that all the prints receive an equal pressure
The finishing was pretty good on the first try but like my initial worry, some of the print was not captured in the small corners. This was due to my error in using a drawing block as a stencil. Nonetheless, I made a second attempt (during my in-class demo) and this time the stencil was made out of art card.
Yes! This time it was a better result!

I wonder what and how your designs might be! Do share some of your attempts if you dare to try~
#art #fineart #printmaking #printmakingart #printmakingadventure #linocut #patternmaking #designprinciples #dalerrowney #dalerrowneysystem3 #system3 #blockprintingmedium
recent posts
- Medjugorje, where Heaven touched Earth: Echoes of a Pilgrim’s Soul
- SS15: A Food Culture Timeline Told in Sips, Bites & Fads
- Teaching Creativity: How Genre Assignments Shape Storytelling Skills in Multimedia Students
- How REXKL Transforms Art Through Cutting-Edge Technology
- An Art Symphony: Exploring the World of Classical Art Through Immersive Design | TAPE Magazine
